Owning a home is often celebrated as a major milestone in personal wealth building, offering stability, freedom, and a tangible sense of accomplishment. However, behind the pride of homeownership lies an ongoing responsibility that dictates whether a property becomes a thriving financial asset or a constant drain on resources: maintenance. A structure is continuously exposed to environmental stress, thermal expansion, moisture migration, and mechanical wear. Over time, components degrade, materials weather, and systems approach the end of their operational lifespans. Approaching homeownership with a passive mindset—waiting for major breakdowns before taking action—inevitably leads to accelerated depreciation and astronomical emergency expenses.
1. Protecting the Overhead Shield: Critical Roof Maintenance
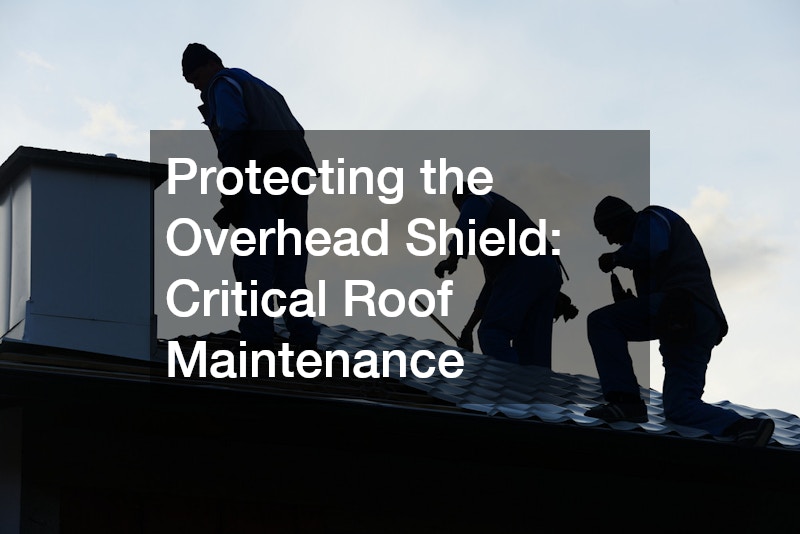
Roof inspections should be conducted twice a year—typically in spring and autumn—as well as after major storms. Begin from the ground using binoculars, or work carefully from a securely anchored ladder. Examine asphalt shingles for curling, clawing, or missing sections. Pay close attention to shingle granules in your gutters; while minor shedding is normal on new roofs, significant granule loss indicates that the asphalt coating is deteriorating and losing its UV protection.
Inspect metal flashing around roof valleys, plumbing vents, dormers, and skylights. These junction points are frequent sources of leaks when old sealant dries, cracks, or separates. Inside the attic, use a high-powered flashlight to check the underside of the roof deck. Look for water staining along rafters, damp insulation, or pinpricks of daylight showing through the decking. Identifying these warning signs early allows you to address localized issues before rot sets in.
Extending Roof Lifespan and Mitigating Immediate Damage
When an active leak occurs during a storm, fast action prevents widespread interior damage. If it is safe to do so, applying an emergency tarp over the affected roof section creates a temporary weather barrier. Secure the tarp with 1×2 wooden battens screwed into the roof structure, rather than relying on heavy objects that can blow off. On the interior, catch dripping water with buckets and poke a small hole in sagging, water-filled drywall to relieve pressure and prevent a catastrophic ceiling collapse.
To maximize your roof’s service life, keep gutters and downspouts clear of leaves and debris. Clogged gutters cause water to back up under the lower shingle courses, rotting the fascia boards and rafter tails. Installing drip edges and ensuring proper attic ventilation are equally vital; balanced ridge and soffit vents lower attic temperatures in the summer and prevent ice dams from forming during winter freeze-thaw cycles. Taking these preventive steps reduces the frequency of unexpected roof repairs while helping extend the life of your entire roofing system.
2. Preventing Tripping Hazards and Exterior Concrete Degradation
Outdoor concrete surfaces such as walkways, patios, and entry steps are constantly exposed to soil movement, moisture, and temperature fluctuations. Beyond compromising your home’s curb appeal, uneven or cracked concrete surfaces pose liability risks and can direct surface water toward your foundation.
Concrete slab damage typically stems from subgrade issues rather than flaws in the concrete itself. When soil beneath a slab becomes oversaturated from poor drainage or leaking downspouts, it loses load-bearing capacity, causing the heavy slab to sink. Conversely, expansive clay soils swell when wet and shrink when dry, leading to movement that cracks rigid concrete above.
Patching, Leveling, and Resurfacing Workflows
For static, non-moving cracks under a quarter-inch wide, thoroughly clean the gap using a wire brush and pressure washer to remove loose dirt and organic matter. Backfill deep cracks with foam backer rod to save material, then fill with a high-performance, self-leveling polyurethane or elastomeric concrete sealant. These flexible materials expand and contract with temperature changes without losing their bond.
When large slabs settle unevenly, replacement is not always necessary. Modern concrete slab lifting—often referred to as polyurethane foam injection or slab-jacking—offers a fast, cost-effective alternative. Technicians drill small holes through the sunken slab and inject expanding foam beneath it, raising the concrete back to its original position within minutes. Completing a timely sidewalk repair eliminates trip hazards and restores proper drainage away from your home.
3. Maintaining Seasonal Climate Systems
A systematic HVAC maintenance routine begins with air filtration. Clogged air filters restrict system airflow, forcing the blower motor to work harder, which increases electrical consumption and can cause the cooling coils to freeze up. Replace standard one-inch pleated filters every 30 to 90 days, or more frequently in homes with pets.
Bi-annually, inspect the indoor evaporator coil and outdoor condenser unit. Remove leaves, grass clippings, and dirt buildup from the condenser fins using a soft brush and gentle garden hose spray; never use a high-pressure power washer, which can bend the delicate aluminum fins. Clean the condensate drain line by pouring a cup of distilled white vinegar down the access T-pipe to dissolve algae buildup and prevent condensate back-ups that can cause water damage.
Resolving Airflow and Efficiency Drops
Watch for signs of mechanical wear, such as squealing fan belts, clicking control boards, or erratic system cycling. If an air conditioner struggles to start or hums loudly without starting the compressor, a failing run capacitor may be the culprit. While replacing minor external components is straightforward, complex electrical issues or refrigerant leaks require professional diagnostic tools to keep the system running smoothly without needing a full HVAC repair.
4. Preserving Chimney Integrity and Fire Safety

Water is a primary enemy of masonry chimneys. When moisture penetrates porous brick and mortar, winter freeze-thaw cycles expand the trapped water, causing the face of the bricks to pop off—a process known as spalling. Inspect the exterior chimney stack for crumbling mortar joints, loose bricks, or hairline cracks in the concrete chimney crown at the top of the stack.
Inside the chimney, inspect the flue liner for creosote accumulation. Creosote is a highly flammable byproduct of wood combustion that settles along flue walls. A deposit exceeding one-eighth of an inch presents a serious fire hazard and requires immediate cleaning. Additionally, check clay flue tiles for cracks or flaking; damaged flue liners can allow heat and toxic gases to pass into surrounding home framing.
Weatherproofing and Masonry Restoration
If mortar joints between bricks have softened or eroded deeper than a half-inch, perform tuckpointing. This involves scraping out old, loose mortar and pressing fresh, color-matched Type N masonry mortar into the joints to restore structural stability. Addressing these small exterior flaws promptly reduces the need for major structural chimney repairs down the road.
5. Navigating Household Electrical Upgrades and Diagnostics
Another safety concern is single-strand aluminum wiring, widely installed during the late 1960s and early 1970s. Aluminum expands and contracts more than copper, which can loosen wire connections at outlets and switches, creating high-resistance points that present a fire risk. If your home contains aluminum branch wiring, have a professional install specialized Copalum crimps or AlumiConn connectors at all junction points.
Safe DIY Troubleshooting vs. Professional Contracting
Homeowners can safely tackle basic electrical updates, such as replacing standard wall outlets, installing modern light fixtures, or swapping out faulty GFCI (Ground Fault Circuit Interrupter) receptacles. Always verify that power is off at the main breaker panel using a reliable non-contact voltage tester before touching exposed wires. Treat every wire as live until your tester confirms otherwise.
For complex jobs—such as upgrading a 100-amp service panel to 200-amps, installing 240-volt EV charger circuits, or rewiring damaged circuits—hire licensed electric repairmen. Professional electricians ensure all work meets local electrical codes, uses proper wire gauges, and incorporates modern AFCI (Arc Fault Circuit Interrupter) breakers to protect your home from electrical arcing hazards.
6. Repairing and Sealing Driveways and Asphalt Surfaces
Effective asphalt maintenance relies on thorough surface preparation. Begin by scrubbing oil and grease spots using a heavy-duty citrus degreaser and stiff bristle brush. Oil breaks down petroleum binders in asphalt, turning hard pavement into soft, crumbling spots if left untreated. Next, clean out cracks and weeds using a wire wheel attachment or pressure washer, blowing out all loose dirt and debris.
For cracks between one-eighth of an inch and one-half of an inch wide, use a hot-pour or high-grade cold-pour rubberized asphalt crack filler. Fill the gap to within a quarter-inch of the top, then smooth the surface using a U-shaped rubber squeegee to form a watertight seal. Preventing surface water from seeping into the gravel subbase helps avoid soft spots and costly frost-heave damage during winter months.
Sealcoating and Professional Resurfacing
If your driveway displays extensive “alligator cracking”—a pattern of interconnected cracks resembling reptile skin—the underlying aggregate base has likely failed. In these cases, surface sealers provide only a temporary cosmetic fix. Addressing structural base failure or deep potholes effectively requires full-depth asphalt patching or complete repaving provided by professional asphalt repair services.
7. Locating and Fixing Subsurface Pool Leaks

Wait 24 hours under normal weather conditions. If the pool water outside the bucket drops significantly lower than the water level inside the bucket, your pool is losing water through a leak rather than evaporation. On average, loss exceeding one-quarter inch per day warrants a closer diagnostic inspection.
Sealing Liners, Concrete Shells, and Plumbing Lines
Isolate the location of the leak by checking the pool with the pump running versus with the pump turned off. If water loss increases while the pump is running, the leak is likely in the pressurized return plumbing lines. If water drops at the same rate when the pump is off, the issue typically lies within the skimmer housing, main drain, underwater light niches, or structural pool shell.
Small cracks in plaster or vinyl liner tears can be patched using underwater epoxy or vinyl repair kits. However, if the leak originates in underground PVC plumbing buried beneath a concrete deck, hire specialized swimming pool leak detection repair technicians who use specialized acoustic listening equipment and helium pressure tests to pinpoint subsurface breaks without unneeded excavation.
8. Structural Foundation Stabilization and Waterproofing
Pay close attention to horizontal cracks along basement walls, stair-step cracks through concrete block mortar lines, or diagonal cracks wider than one-quarter inch that widen near the top. These patterns often indicate high hydrostatic pressure from wet soil pushing inward against the walls, or differential settling under your home’s footings. Interior signs of structural movement include sticking interior doors, sloping floors, and drywall cracks above door frames.
Moisture Control and Structural Underpinning
Managing foundation health requires controlling water accumulation around your home’s perimeter. Ensure downspouts discharge water at least six to ten feet away from foundation walls. Keep soil graded so it slopes downward away from the house, and consider installing an exterior perimeter French drain or an interior sump pump system to catch groundwater before it forces its way through basement floors.
When structural movement occurs, modern stabilization techniques offer durable fixes. Wall bowing can often be reinforced from the inside using high-tensile carbon fiber straps bonded directly to the concrete with structural epoxy. If the foundation is settling downwards, deep steel helical piers can be driven down into stable bedrock or load-bearing soil strata to lift and permanently stabilize your home’s concrete foundation repair.
9. Troubleshooting and Servicing Heating Furnaces
If the system attempts to start but shuts down after a few seconds, a dirty flame sensor is often the cause. The flame sensor is a thin metal rod positioned in the burner flame path. Over time, microscopic carbon deposits coat the sensor, preventing it from detecting the flame, which causes the control board to shut off the gas valve as a safety precaution. Restoring proper operation is often as simple as turning off the power, removing the sensor, and gently cleaning the metal rod with fine steel wool.
Heat Exchanger Safety and Component Replacement
Regularly inspect your furnace’s heat exchanger. The heat exchanger separates dangerous combustion gases—including odorless carbon monoxide—from the clean air circulating through your home. Look for signs of heavy rust, soot deposits around the burner chamber, or hairline cracks along the metal heat exchanger tubes.
Always leave complex gas valve adjustments, draft inducer replacements, and heat exchanger repairs to certified professionals. Licensed technicians use specialized combustion analyzers to measure fuel efficiency, adjust manifold pressure, and conduct safe furnace repair services that keep your heating system running reliably all winter long.
10. Optimizing Cooling Performance During Extreme Heat

To clean the condenser, shut off power at the nearby exterior disconnect box. Clear away tall grass, weeds, and stored items to maintain a clear two-foot perimeter around the unit. Spray the exterior fins from the inside out using a gentle garden hose to flush away trapped dirt. If the thin aluminum fins are bent, carefully straighten them using a specialized plastic fin comb tool to restore smooth airflow.
Handling Refrigerant Leaks and Mechanical Failures
If your central air conditioning unit runs continuously without adequately lowering indoor temperatures—or if ice forms along the outdoor copper refrigerant lines—your system may be experiencing restricted airflow or low refrigerant levels. Ice buildup occurs when a low refrigerant charge drops the evaporator coil temperature below freezing, causing ambient air moisture to freeze on the coil and block airflow.
Running an air conditioner with frozen coils can permanently damage the compressor. Turn the system off at the thermostat and switch the fan setting to “ON” to let the ice melt. Because refrigerant circuits are sealed, high-pressure systems regulated by environmental protection laws, fixing leaks and recharging refrigerant requires specialized diagnostic equipment and certified technicians trained in local air conditioning repairs.
To stay on top of home upkeep, establish a centralized home maintenance logbook—either in a physical binder or a digital spreadsheet. Record the date, cost, and scope of every repair, along with equipment model numbers, warranty documents, and contractor contact information. This detailed history not only keeps your routine seasonal tasks organized, but also serves as a valuable record that reassures buyers and commands top market value when you choose to sell your home.